This week I started work on two mini Parker Knoll armchairs. As I wanted to keep one in our nursery and sell the other, I decided to do mine first so that if I made any mistakes on the first one then I would know how to do the second one better. I am so glad I decided to do this as I have already had to redo a couple of bits!
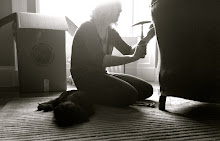
It took me nearly two days to strip, due to stubborn staples and an ever growing bump getting in the way of bending and general flexibility! I haven't done enough of the new upholstery (that I'm happy with) to post photos yet but here is how the chair looked while being stripped.
 |
| The back |
 |
| The front |
 |
| The Parker Knoll! |
 |
| The back stripped, showing the springs that keep the chair in place when you lean back. |
|
 |
| Stripped and ready to be put back together again. |


No comments:
Post a Comment