
This week I got the chance to work on two chairs. It was quite a challenge since the client had chosen a luxuriously thick patterned material of which there was enough by millimetres, there was so much piping to stitch, and I had to make the second chair look exactly like the first!
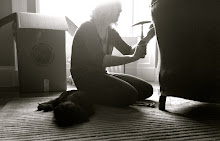
I started by stripping the original material off. These chairs were modernly upholstered, i.e with foam and staples. I found a ten pence piece inside with 1992 as the date - though obviously this means they could have been upholstered any time since then, I like to think that someone put the coin in as a memento of that particular year. That would mean I was just six and still aspiring to be a pig farmer when these chairs were last worked on, never imagining that I would grow up to be an upholsterer. Anyway...
Modern upholstery is notoriously hard to strip since you have to use so many staples to keep the material in place. It is difficult to get your staple remover under the old staples and results in many blisters - very tiring work...


Once the material was off I separated each piece and used them as a template to cut the new material. This was tricky as the pattern needed to match up when attached to the chair, and due to the amount of material there was no room for error.

When the material was cut I started stitching the panels together and stitching the piping. I strongly believed that practise makes perfect and the more piping I stitch the better it will get. That was until an upholsterer friend of mine, who is a pro on her sewing machine, told me that she still finds piping a nightmare. I fear I will eternally dread it.
But, once the stitching was all done I got onto the fun part. The seat material was temporary tacked (i.e with tacks not hammered in properly so they are easily removed to change things) so that I could get the pattern on evenly and pull the material tight. Once this was exactly how I wanted it I stapled it onto the frame. The arms went on next, again with temporary tacks to ensure both arms matched before being stapled. Then the seat back was stapled down and I hand stitched the piping edge to the edge running against the arms. Finally the back was attached and I glued on two lines of braiding to cover the staples.


Although a challenge, these chairs provided a good chance to practice some new and old skills, I am pleased with the results, and there was even a good sized off-cut to make a bonus cushion cover!

No comments:
Post a Comment